
If you're a trainer managing your students, you know how important it is to keep your students engaged and updated. That's why we're here to show you how to create a group chat on Hilokal, a great way to communicate with your students and answer any questions they may have.
Follow these simple steps to creating a group chat:
- Access the web app version of Hilokal and login with your trainer account.
First things first, to create a group chat on Hilokal, your account must have trainer status. This means that you're verified as a Hilokal trainer and have access to all the necessary tools to create and manage group chats. You'll then need to access the web app version of Hilokal. This is the version that you access through your computer or other device, not the mobile app.
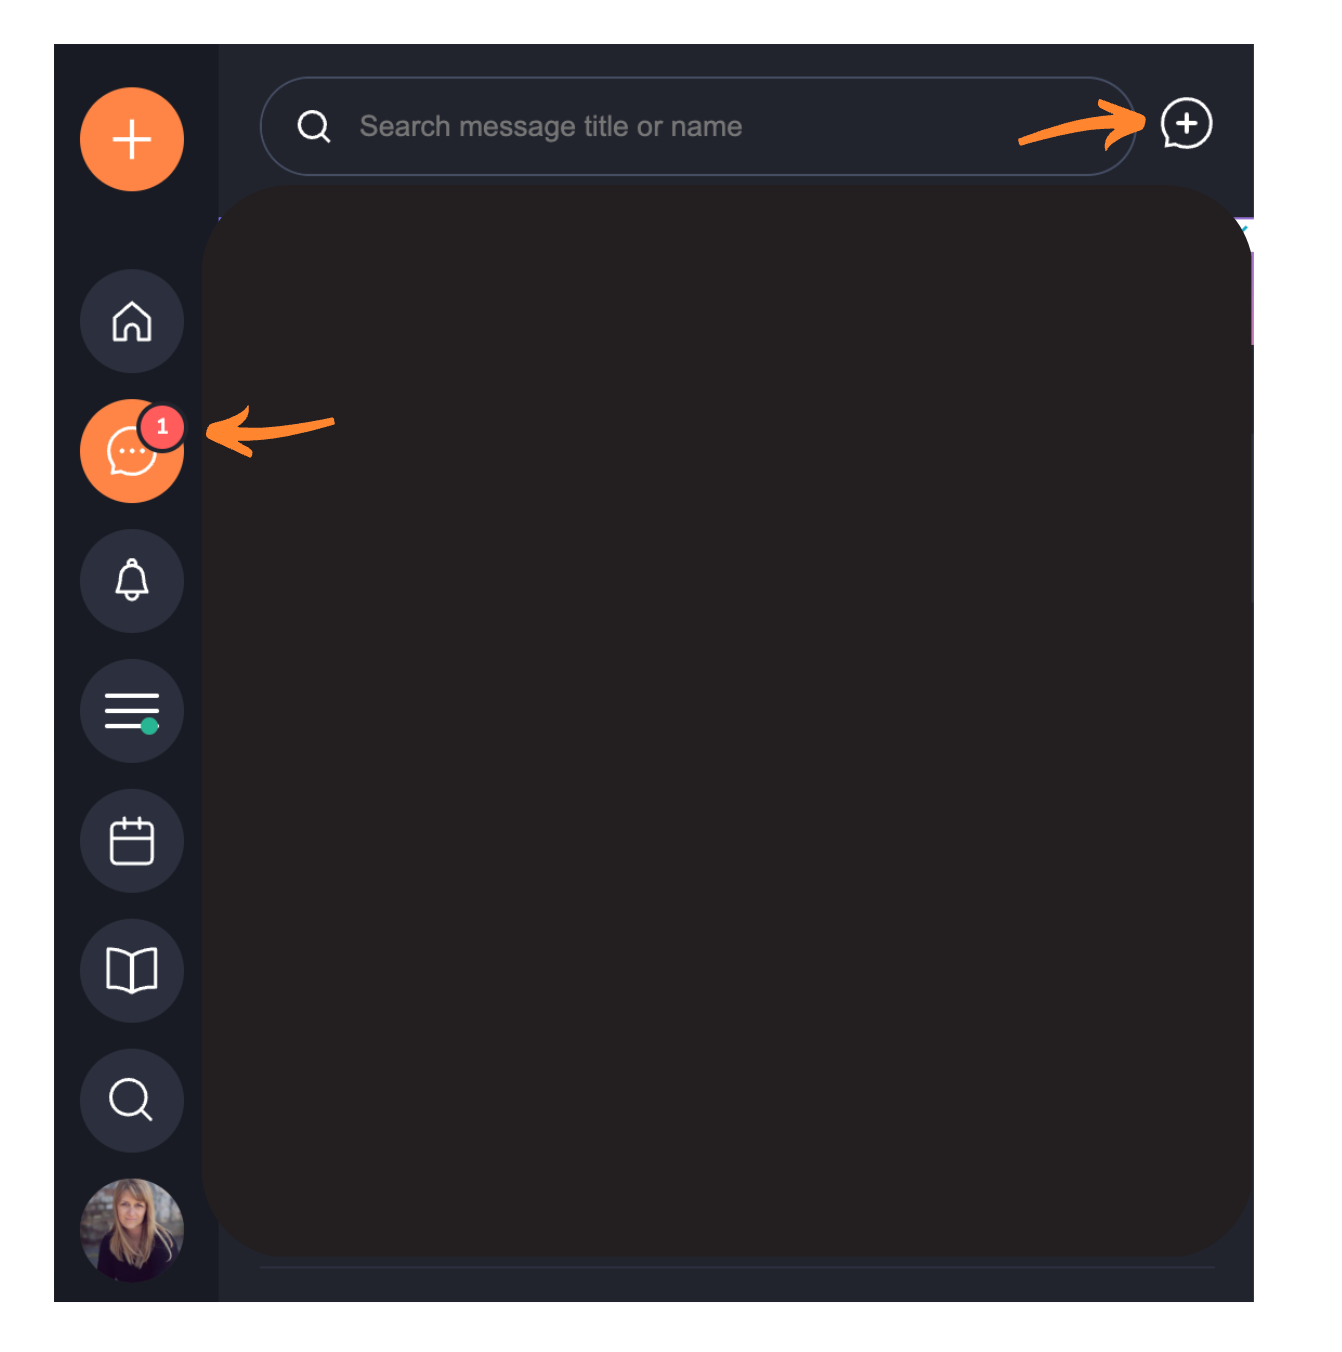
2. Navigate to the direct messages section and press the + button at the top of the chat list.
Once you're in the web app, you'll see the direct messages section. This is where you'll find all of your individual chat conversations with other Hilokal users. To create a new group chat, simply press the + button at the top of the chat list. This will bring up a new window.
3. Invite people from your friends list.
Now, you'll want to invite people from your friends list. Your friends list is made up of mutual followers, so if you want to invite someone to your group chat who isn't on this list, you'll need to make sure you're following each other first.
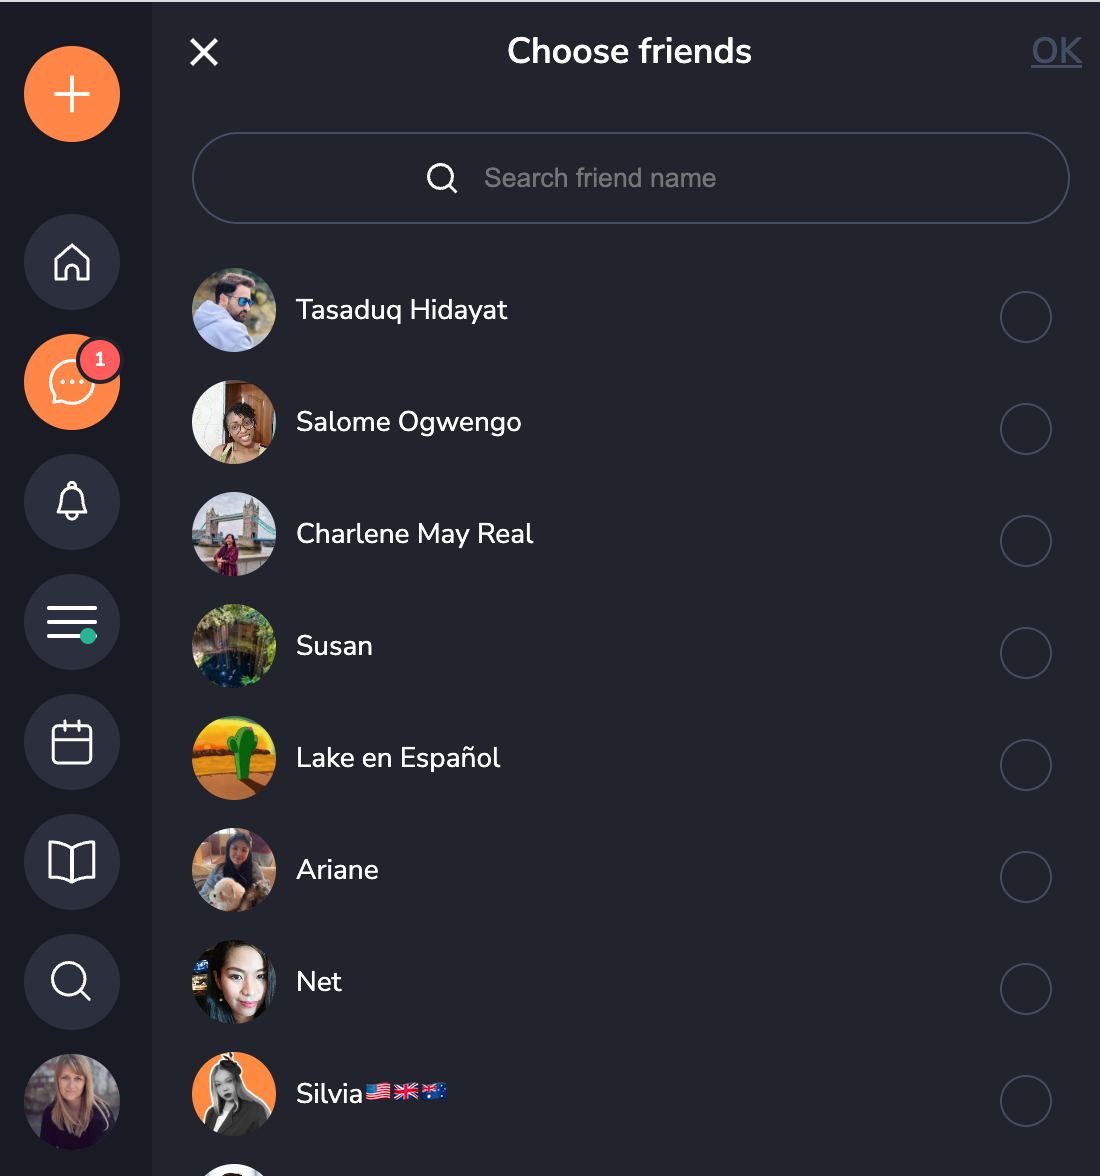
4. Press "OK" to create the group chat.
Once you've selected the people you want in your group chat, simply press "Ok" and your group chat will be created! You can also edit your chats name/title.
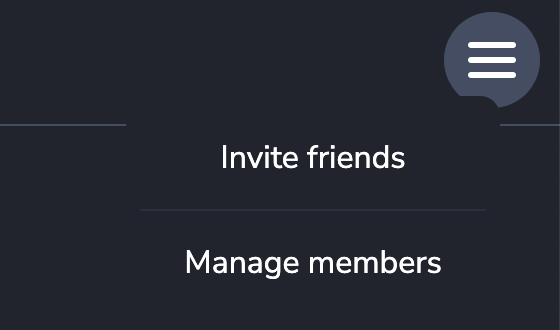
5. Use invite link or the hamburger menu in the top right of the window to invite new members to the group chat at any time.
It's worth noting that you can always invite new members to your group chat even after it's been created. This can be done through an invite link or by selecting people from the hamburger menu in the top right of the window. There is also a tab to manage the members of your group chat.
So, you've created your group chat, now what?
Here are a few tips to help you succeed with your group chat and keep your students engaged:
- Give your group chat a meaningful and relevant title. This is something your students will recognize and find important, so be creative and make it count!
- Always ask permission before inviting students into your group chat. Not everyone will want to join, and it's important to respect their privacy.
- Add value to your group chat by sharing notes from classes, valuable content that you'll cover in upcoming classes, encouragement, and anything else you think will help engage your students.
- Reach out to students who joined your class immediately after class and let them know about your group chat. This is a great way to grow your presence on Hilokal and make sure your students are always in the know.
Creating a group chat on Hilokal is a great way to communicate with your students and keep them engaged. By following these tips, you'll be able to create a successful group chat that your students will love. So, get out there and start creating!

